An economical, easy copycat of the fan favourite Bakers’ Delight pizza bread, a much loved lunch-on-the-run! Named as such as it’s designed to be tucked into lunchboxes and eaten at room temp rather than piping hot like normal pizza. Think: morning tea, picnics, hungry teenagers, freezer stash!
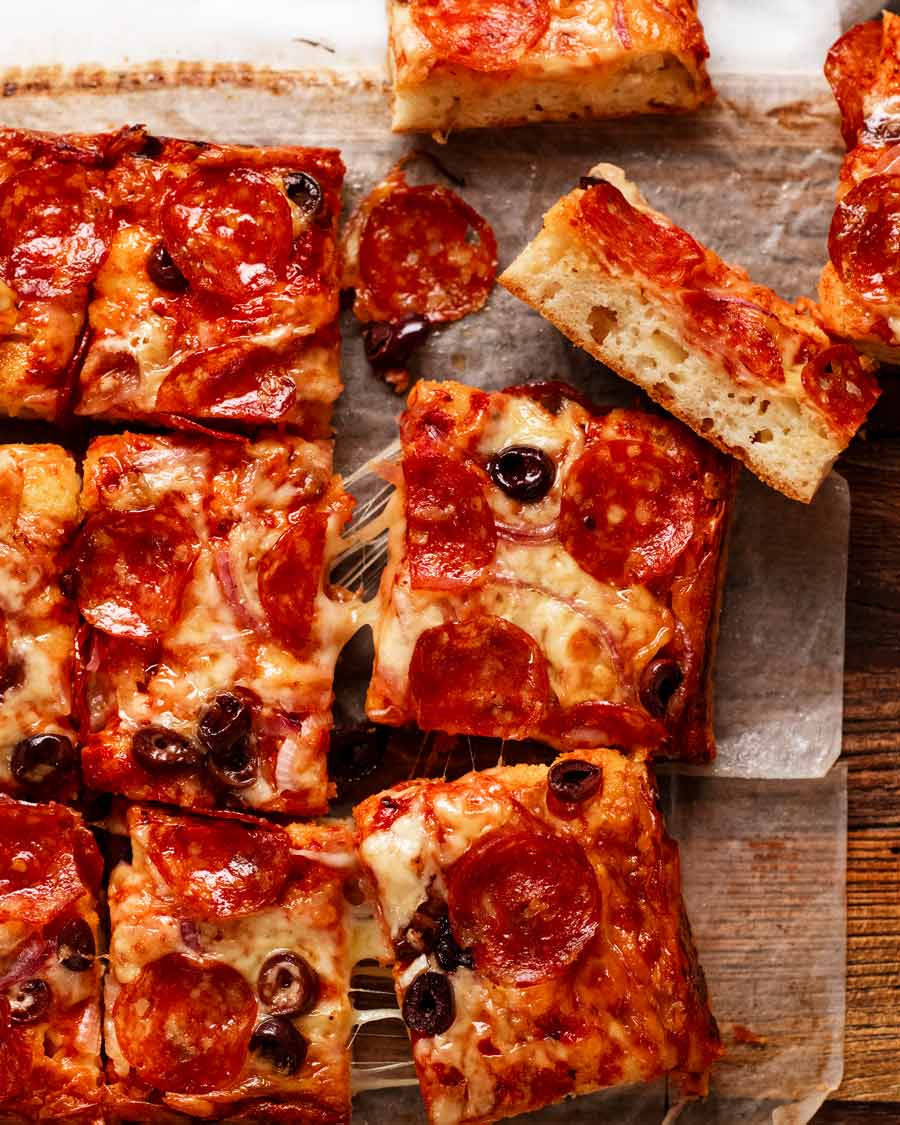
A homemade pizza bread
There’s a popular bakery chain here in Australia called Bakers’ Delight which sells a myriad of baked goods, ranging from sweet cinnamon buns to savoury bread rolls that are a convenient “lunch on the run”.
I’ve always wanted to recreate the fan favourite pizza breads. And noticing that the RRP has crept up to $4.90 (inflation!) was just the kick I needed to get moving on it.
Rather than making individual pizzas, I decided to take the easier option of making a large pizza slab then cutting it into portions. I then went one step further and decided to use a simple cheesy muffin batter rather than yeast-based proper pizza dough which needs hours to rise.
So here it is today – my pizza bread. It’s a great one for lunch boxes or taking to places, like morning tea at work because it’s designed to be eaten at room temperature.
Ingredients in pizza bread
This is a quick pizza bread that’s based on a savoury muffin batter. Which means – no yeast, no kneading, no rise time. Mix and bake!
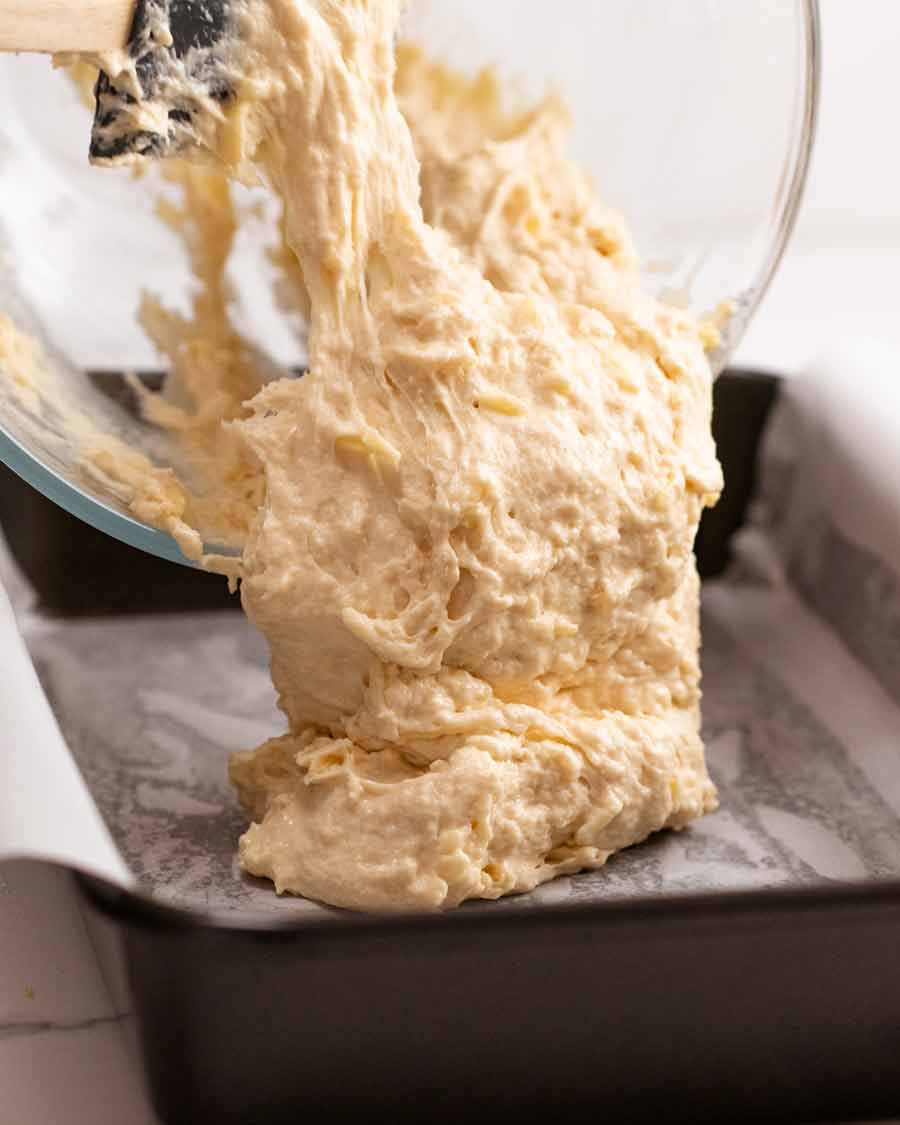
The batter
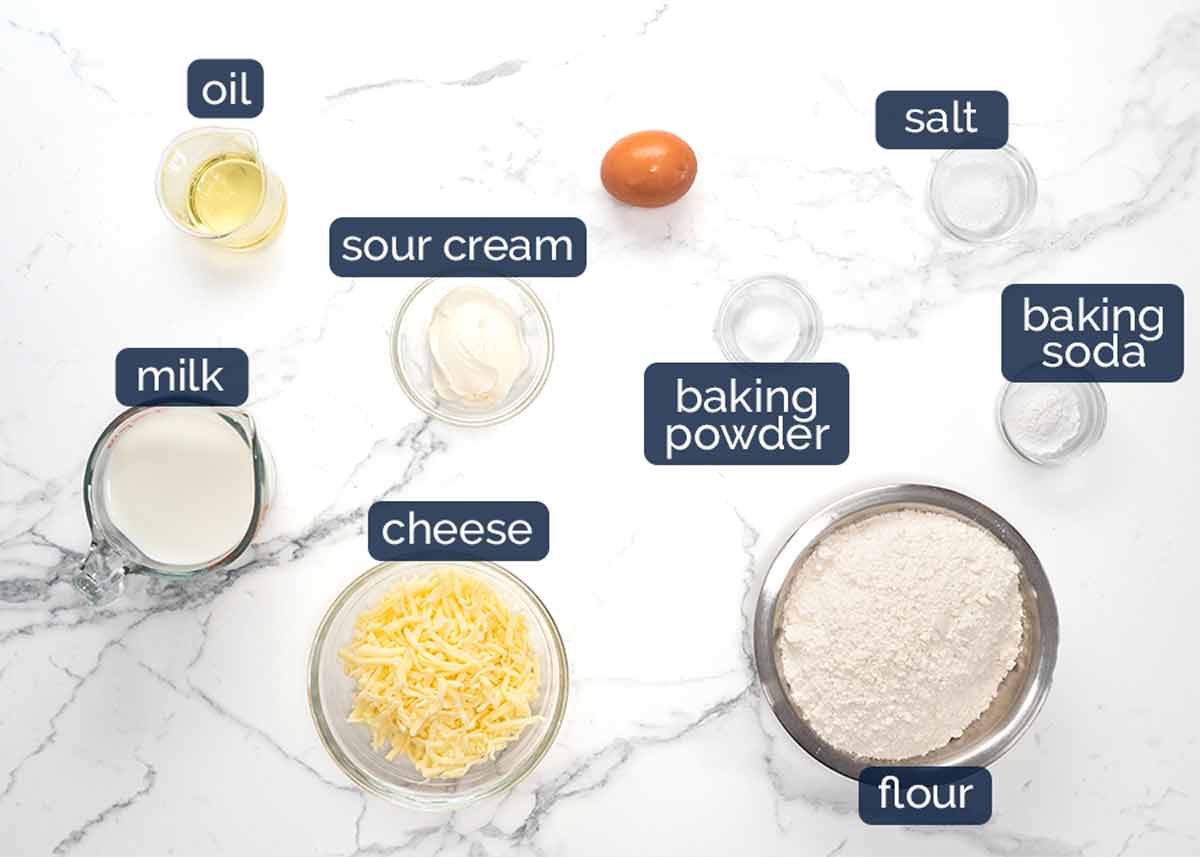
Flour – Just plain / all purpose flour. Self raising flour will work in place of the flour + baking powder + baking soda but the crumb is not as soft or springy, and will not stay fresh for as long.
Baking powder + baking soda (bi-carb) – I know, it’s soooo irritating when I ask you to use both instead of one or the other! I wouldn’t ask it of you unless it matters – and in this case it really does make a noticeable difference.
Basically, both make muffins, cakes etc rise. But baking soda is like triple strength baking powder, and they have different rising qualities depending on what other ingredients are used. For this recipe, only baking powder = crumb not as soft or moist. Only baking soda = mound rather than flat surface. Combo of both = perfect!
Shredded cheese – Used to flavour the crumb and top the bread. Use your favourite shredded cheese (or cheese blend) that melts except mozzarella which doesn’t have much flavour. I use Devondale 3 cheese blend (mozzarella, colby, parmesan) which is my favourite store bought shredded cheese for both melting qualities and flavour (I’m in Australia).
If mozzarella is all you’ve got, just add an extra 1/2 teaspoon salt in the batter.
Pre-shredded ok! Usually I recommend shredding your own but in this case pre-shredded is fine, in the spirit of this quick & easy recipe!
Milk & sour cream (or yogurt) – These are the liquids for this batter. The sour cream keeps the pizza bread stay moist for several days rather than going stale the next day which is what happens to most muffins. For baking enthusiasts: the reason for this is because sour cream is thicker than milk so you don’t need as much flour in the batter to get it to the right consistency. Less flour = more moist crumb.
Olive oil – This too helps keep the crumb moist. This is because butter, the other most common fat used in baking, adds lovely buttery flavour but it firms up at room temperature = drier crumb. Oil, on the other hand, remains in liquid form which means the crumb is more moist.
Egg – This is the binding agent in the batter. We only use 1 egg and this is another reason the shelf life of this bread is so great: because more egg in batters = drier crumb.
Salt – For seasoning.
Toppings
I’m going for quick ‘n easy today, so I’ve used a store bought pizza sauce. However, if you’re a better person than me, please feel free to make your own (any of the 3 options are great).
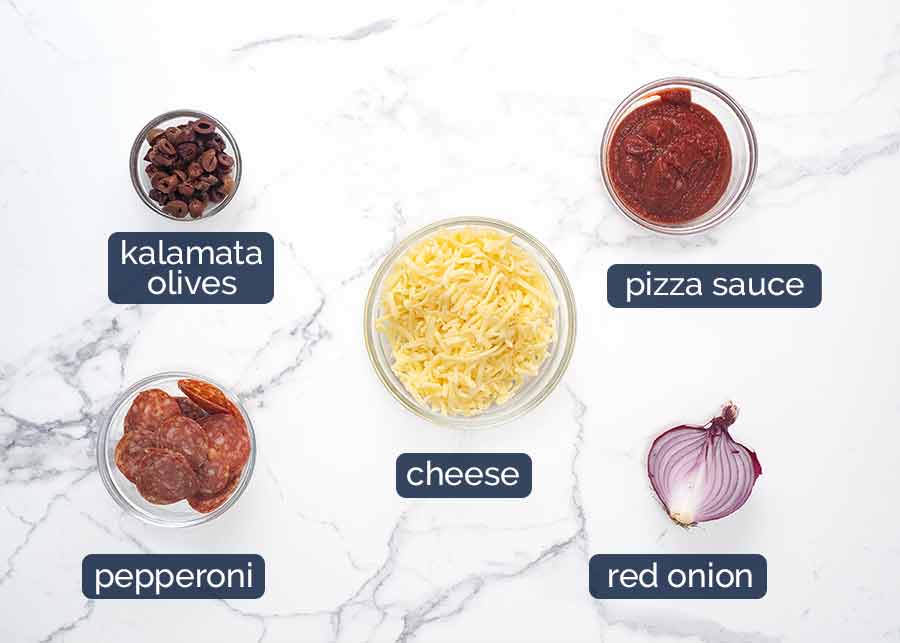
Pizza sauce – As noted above, this is just store bought. Use any flavour your heart desires!
Toppings – Pepperoni, sliced olives, onion and green capsicum / bell peppers (yup, missing from photo above and half the pizza photos!). Feel free to use whatever you want.
Shredded cheese – I just use the same cheese as noted above in the batter.
How to make my easy pizza bread
You’re going to LOVE how easy this is! Ready?
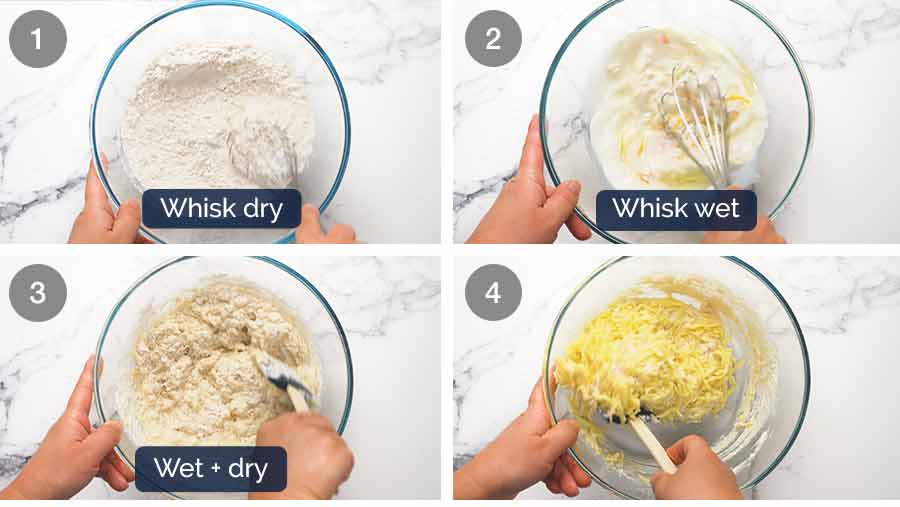
Whisk Dry ingredients in a bowl. I whisk the dry first so the whisk stays clean to use for the wet ingredients!
Whisk Wet ingredients in a separate bowl.
Combine – Pour the Wet ingredients into the Dry ingredients then mix with a rubber spatula until the flour is mostly mixed in but you can still see a bit. It will still be lumpy – that’s ok!
Add cheese then mix until you can no longer see flour. If the batter still has some small flour lumps, that’s fine as they will bake out. What you do not want to do is mix too much because this will activate the gluten in the flour and make the crumb hard and dense.
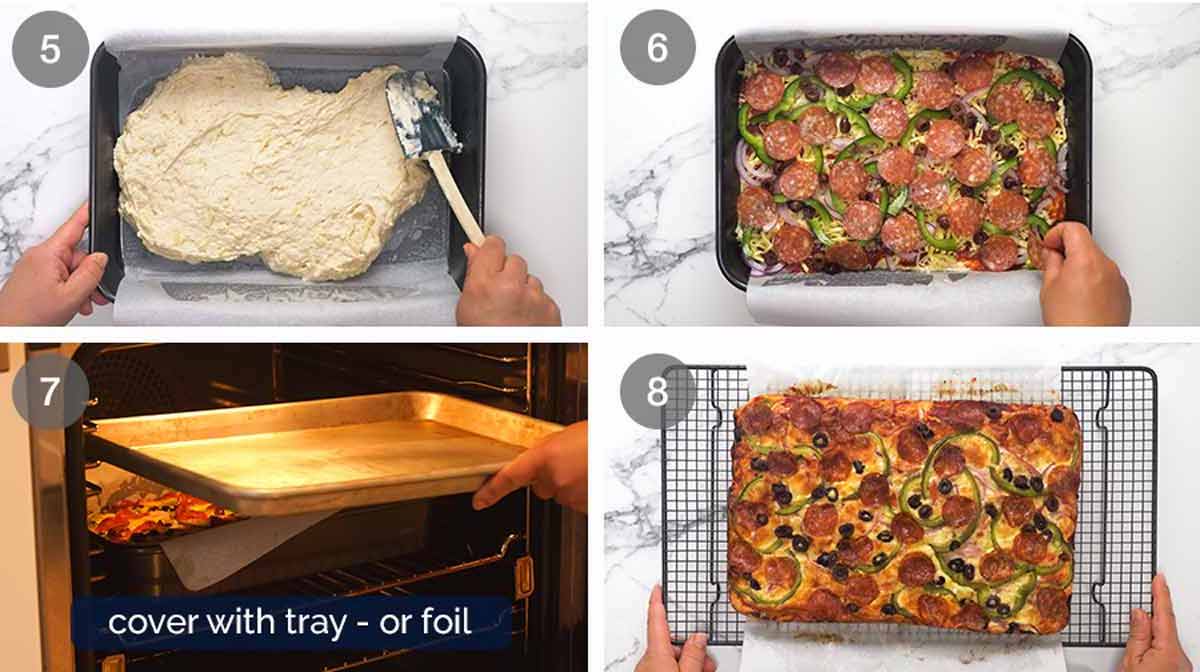
Spread the batter into a 23 x 33 cm (9 x 13″) lined metal pan. I spray with oil then line the base and long sides with a single large sheet of paper, with overhang to make it easy to lift out later. There’s no need to line the short sides if you spray with oil.
Ceramic and glass pans will also work but the bread will rise a smidge less and I would add an extra 3 minutes to the bake time. This is because glass takes a little longer to heat up.
Toppings – Spread with pizza sauce, then top with cheese, onion, capsicum (which I forgot in half the photos!), olives and pepperoni (in that order).
Bake 40 minutes – Bake uncovered for 25 minutes. Then pop a baking tray on top and bake for a further 15 minutes. This will stop the cheese from getting a little too golden.
Cool for 10 minutes in the pan, then 10 minutes on a cooling rack before slicing to serve.
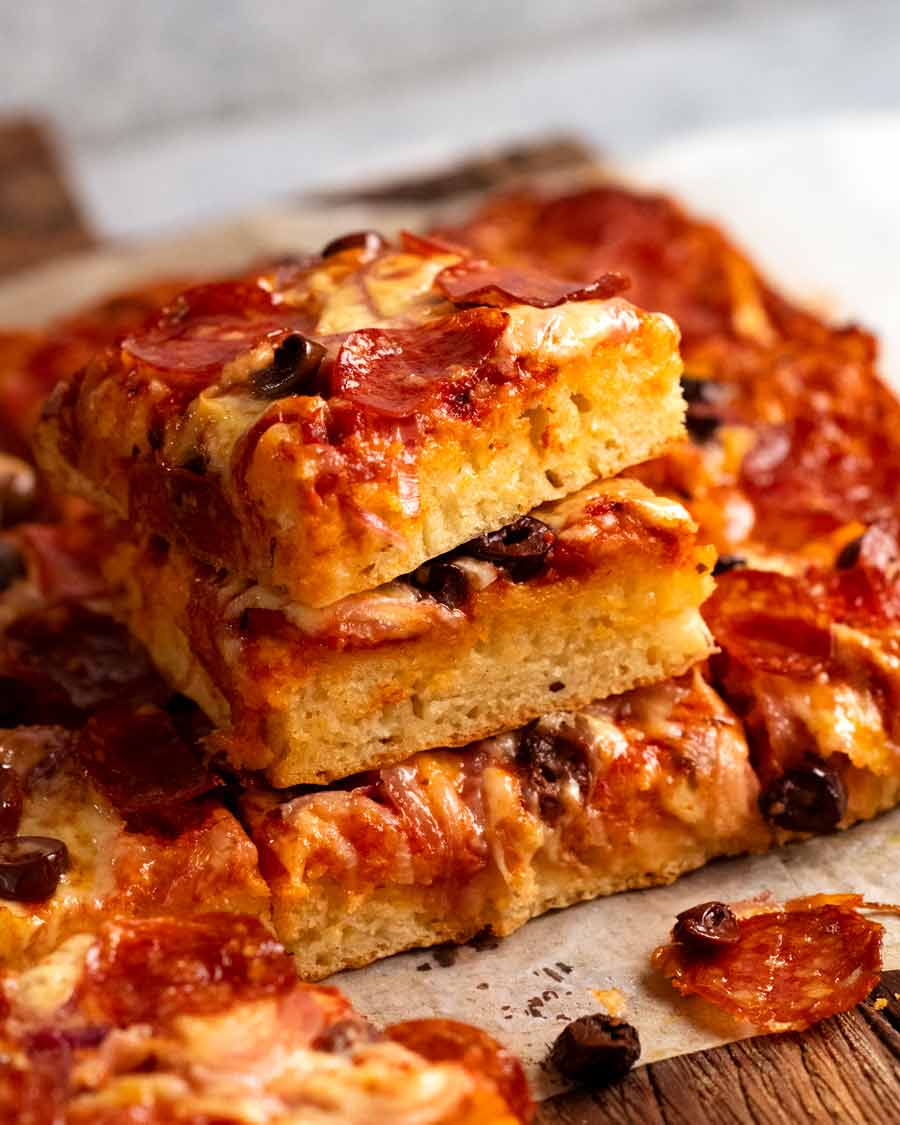
It’s important to follow recipe directions for cooling baked goods because they finish cooking inside. If you slice this bread when it’s piping hot, straight out of the oven, then the inside will taste a bit “doughy” and undercooked.
This bread will still be warm after 20 minutes resting time. But it’s also specifically designed to be tasty at room temperature, for popping into lunch boxes! And it will stay fresh for 3 to 4 days.
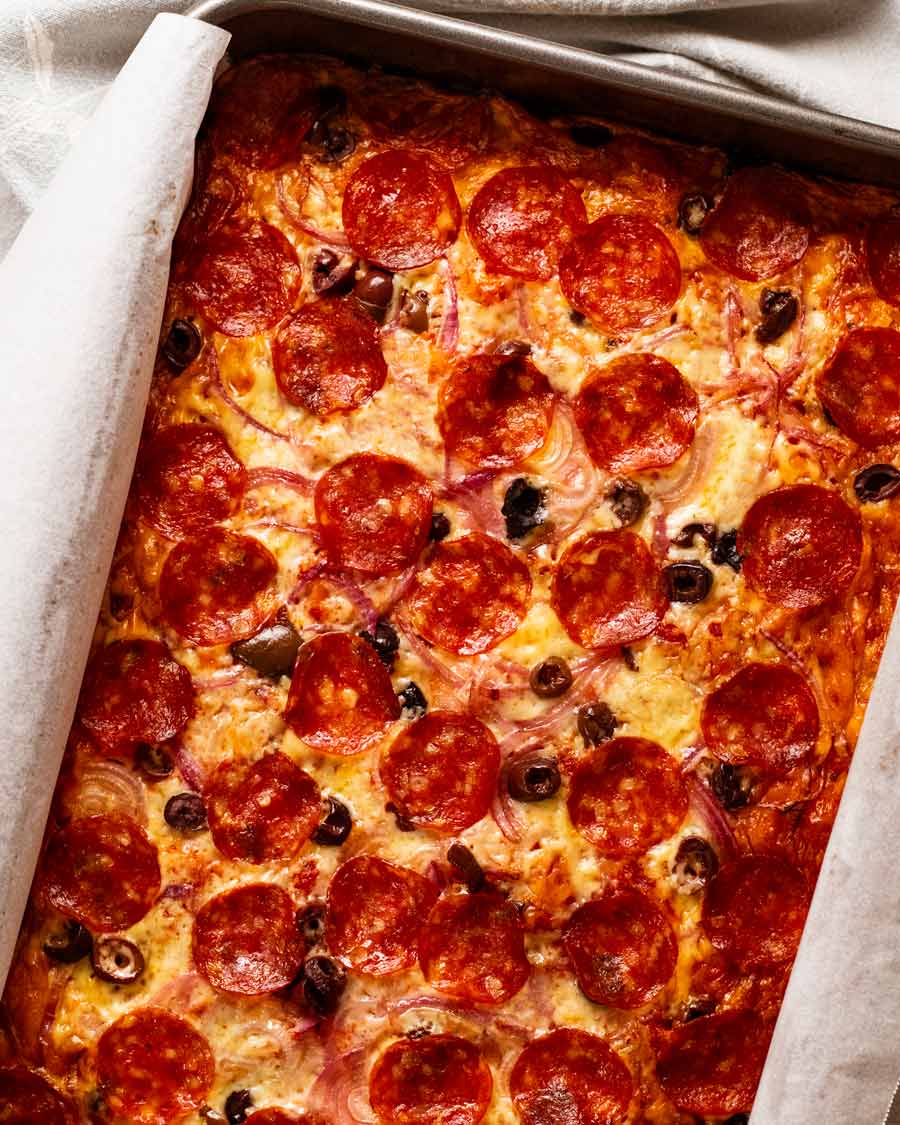
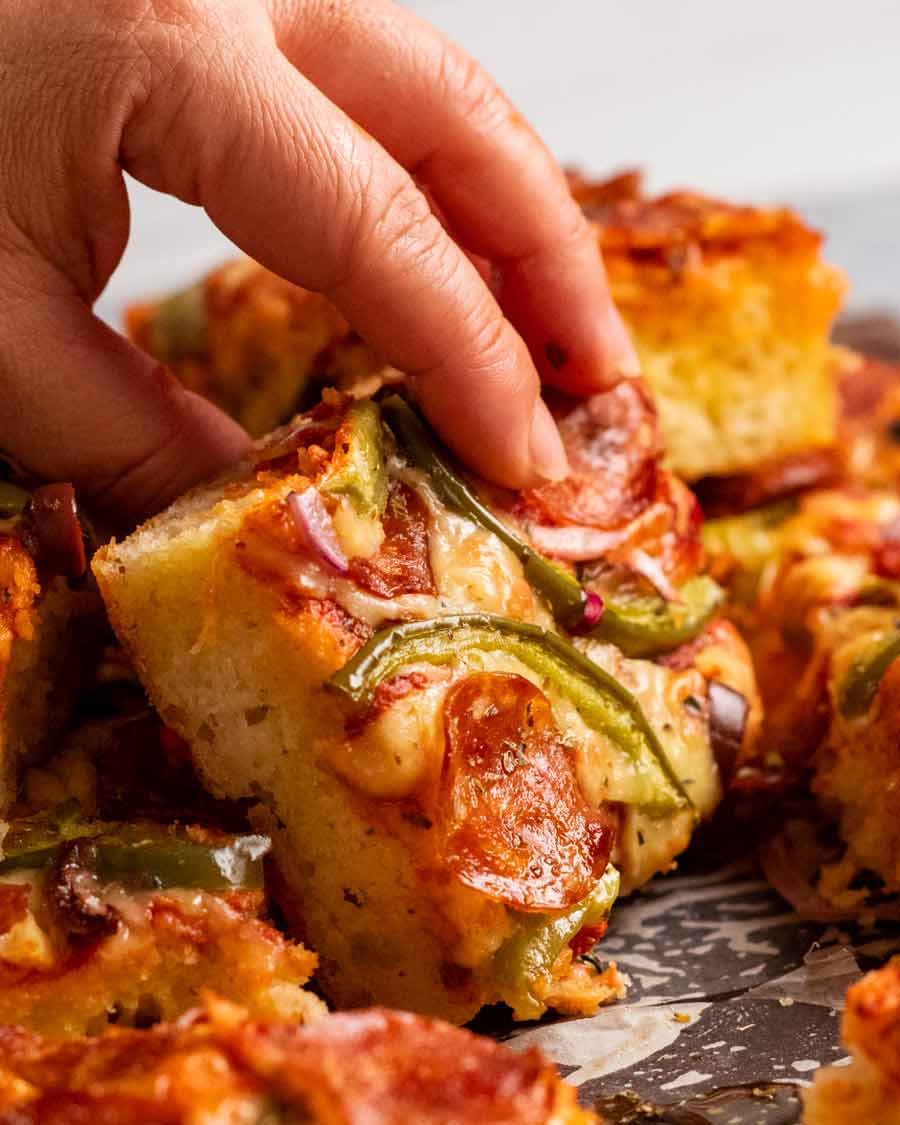
How to serve Lunchbox Pizza Bread
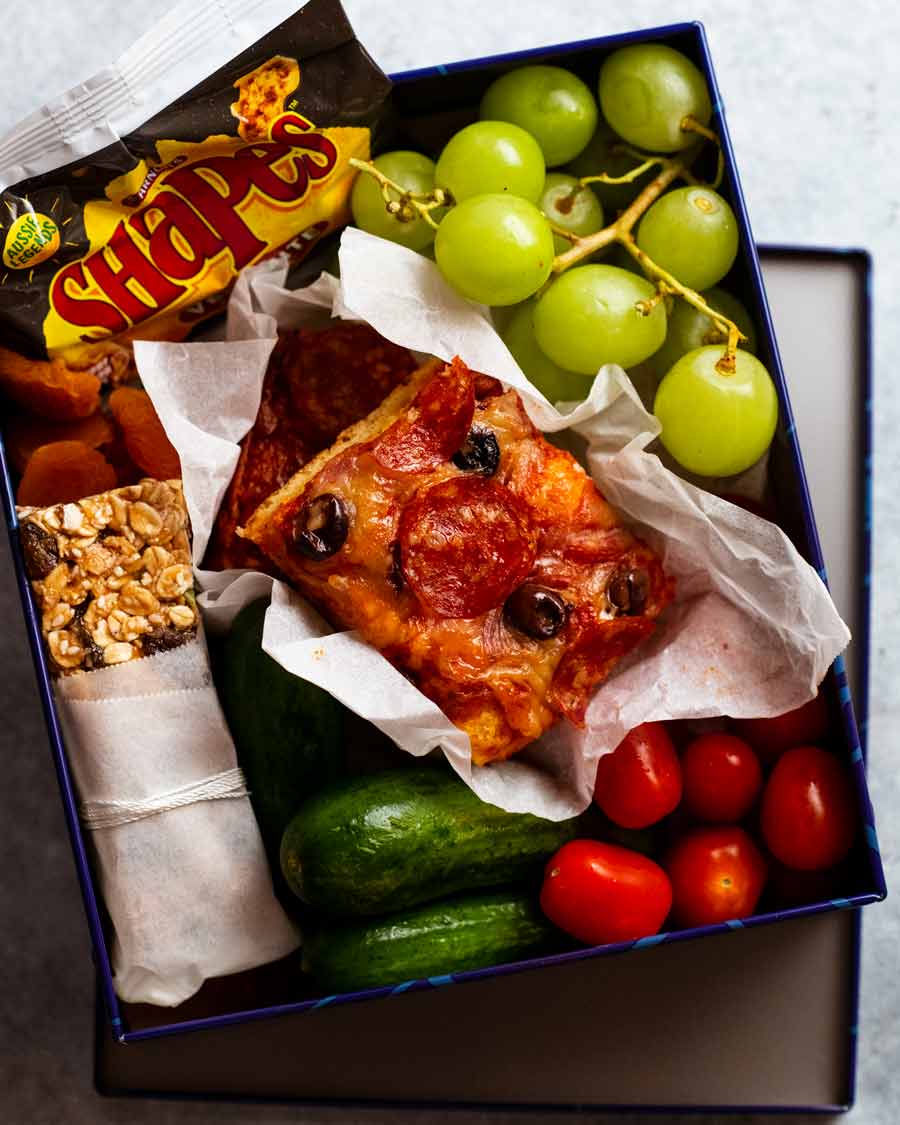
As mentioned at the top, this pizza bread is designed to be eaten at room temperature like a savoury muffin rather than piping-hot-straight-out-of-the-oven like pizza, easy to make in bulk (do 2 pans at once!) and freezes perfectly.
Which means it’s:
great to pop into lunch boxes – the original idea I had when I decided I set out to create this recipe, hence the name! Pictured in post (top) with a homemade muesli bar.
ideal to take into work for a shared morning tea
a handy breakfast on the run
useful to feed permanently hungry teenagers
It’s about 70% cheaper than buying pizza rolls from Bakers Delight. And finally, my last effort to convince you to try this? There’s nothing like homemade. Right? – Nagi x
Watch how to make it
Hungry for more? Subscribe to my newsletter and follow along on Facebook, Pinterest and Instagram for all of the latest updates.

Lunchbox pizza bread (quick)
Ingredients
DRY INGREDIENTS:
- 2 cups plain flour (all-purpose flour)
- 1 1/2 tsp baking powder
- 1/2 tsp baking soda / bi-carb soda , sifted (Note 1)
- 1/2 tsp cooking/kosher salt
WET:
- 1 large egg (60g / 2 oz)
- 1 cup milk (full or low fat)
- 1/4 cup sour cream , or plain yogurt
- 3 tbsp olive oil
CHEESE FOR BATTER:
- 1 cup shredded cheese (colby, cheddar, Monterey Jack, Devondale "3 cheese blend") (Note 2)
PIZZA TOPPINGS:
- 1 1/2 cups shredded cheese, same as above (Note 2)
- 1/2 cup pizza sauce , store bought or homemade (any of them)
- 1/4 red onion , finely sliced
- 1/2 green capsicum / bell pepper , finely sliced
- 1/4 cup sliced kalamata olives
- 50g/ 2 oz pepperoni slices (about 1/2 cup)
Instructions
- Preheat oven to 180°C/350°F (160°C fan). Oil spray a 23 x 33 cm (9 x 13") metal pan then line with baking / parchment paper (Note 3).
- Whisk Dry ingredients in a large bowl.
- Whisk Wet ingredients in a separate bowl until combined.
- Combine Wet & Dry – Pour Wet into the Dry ingredients. Mix with a rubber spatula until the flour is mostly mixed in but you can still see a bit of flour. Add cheese then stir until you can no longer see flour. Some small lumps is fine, they will bake out.
- Assemble – Scrape into the baking pan and evenly spread – it's not that thick, remember it rises! Spread the surface with pizza sauce. Sprinkle with cheese, then (in this order) onion, capsicum, olives then pepperoni.
- Bake 40 min – Bake 25 minutes uncovered. Cover with a baking tray (or foil) then bake for a further 15 minutes.
- Cool 10 minutes in the pan then use the paper overhang to lift or slide out onto a cooling rack. Cool for a further 10 minutes before slicing to serve.
- Serving – Great at room temp though for VIP's, sometimes I warm it in the oven, drizzle with a swish of olive oil and sprinkle with a pinch of oregano.
Recipe Notes:
Nutrition Information:
Life of Dozer
Raise your hand if you think I said “yes Dozer, go ahead and have a swim in that stinky golf dam filled with decaying aquatic plants. I really love how you smell afterwards!”. 😖



Made this last night. Delicious, thank you.
Best recipe I’ve tried so far! Really easy to make, no kneading needed, devoured in seconds. Thank you Nagi, this is definitely a winner.
We made this today too – unfortunately not a hit. The base and bread went very brown in color like another reviewers. Does anyone know why?
Another winner from Nagi! I added half a sliced jalapeño for a little heat. Otherwise followed recipe using my homemade sauce
I made this tonight and followed all instructions in the recipe carefully. But the pizza bread came out sooo salty! It was barely edible at all. I had to throw it away. A shame because it baked very well. 😞 (it was also brown in colour instead of pale yellow/golden like the photos) if anyone has an explanation I’d appreciate it!
I added a teaspoon of oregano to the dry mix and left all else the same. So, so good and easy! Perfect for school lunches! Delicious cold or warm! Slam dunk!
I subbed the flour with gluten free all purpose and it turned out amazing!!
I added a few herbs to the base mix and used caramelized onion relish on the base as well 😙👌
Just made this, only changes being that I added about a tablespoon of dried basil/oregano/garlic to the dried mix. This pizza bread is scary easy to make. Light, fluffy, cozy. Cheap and easy to customize. I want this to be my birthday cake.
Sub of the year so far….. Couldn’t find any bicarb in the pantry so my 8 year old came up with a packet of red bicarb from his volcano experiment. Worked a treat and we now have red pizza bread in his lunchbox. Wish I could share the photo as it’s a classic . Dough is very very dry but once the toppings are on it adds moisture. Actually took me 35 minutes to cook at 160 fan.
I came across Nagi & Dozer a few years back and keep coming back for more!🥰. Love the new book👍. This quick pizza recipe was a winner. As always, I have to tweak recipes – I added chilli flakes, dried oregano & basil, freshly ground black pepper to the base. Made it quite a few times now- keeps well- if it isn’t all gone in a few hours!
This recipe is so easy and SOO GOOD! Everything from the amount of sauce, cheese, taste right down to the baking instructions was perfection. My kids are absolutely in love with this pizza bread and so am I. Thank you for yet another amazing recipe. I love the bread layer. It’s soft, chewy, tasty and lighter then I imagined. Best of all no yeast, no rising times and no kneading! You must stop reading reviews and try this recipe now.
This came out awesome! I don’t enjoy having to knead dough, so as soon as I saw this recipe, I knew it was for me. The only tiny tweak I made was using a tsp of the kosher salt instead of a 1/2 tsp because we’re all about the salty food in my house. Otherwise, I followed the recipe to the letter – so yummy! Thanks for a fantastic recipe!
This one is really good. Followed the recipe but used yoghurt instead of sour cream. Worked 100%, and lunches sorted for the next few days.
DO NOT confuse this for a nice Chicago deep dish pizza haha.
Thanks and tasty!
I made this for the first time today and it is DELICIOUS!!!! I’m intimidated by yeast and this just was perfect. Since I don’t have small children, I changed to toppings to carmelized mushrooms and onions, two cups shredded cheese along with the pepperoni. I did spray the pan with EVOO before placing the dough in it for an extra crispy crust. As far as I’m concerned, this is my go to pizza recipe unless my grandchildren want a thin crust which I’ll buy. Thanks for such an easy and great recipe.
Please post more easy lunchbox recipes. This is a winner!
Nagi you’ve done it again! This brings me back to my hot lunches from school days where we got pizza. It’s nostalgia in a slice. Nice change from ‘traditional’ pizza. Baked perfectly – super easy to make! Love you Nagi and Dozer too of course 🙂
This is unbelievably good, easy and so delicious. Ensure you follow the baking steps, that is after 25 minutes cover and bake for a further 15 minutes. I nearly missed that. I was too excited to get it in the oven. Another 10/10 recipe Nagi. Love love love. 😁
Just made it for school and work tomorrow. It worked perfectly (of course). This will be a weekly thing because I usually buy something like this from coles bakery or bakers delight and yep they’re so expensive now, especially for 4 big eater males! Made this with salami. I’ll experiment with flavours. Thanks Nagi.
Hi Nagi
Thankyou for this quick easier healthier recipe.
Mine was great.
It came out moist as expected, but perhaps a bit too moist. How can i make just a little less moist?
Also can i use gf plain flour?
Try substituting maybe a quarter of the plain flour with wholemeal flour to make it less moist. Not too much or it’ll be dry. Also make sure to cool on a rack to avoid a soggy base.
I toggled it to 7 servings to fit in a square pan (didn’t need a big serve)- used 50:50 wholemeal flour/white flour. Subbed ham for pepperoni. Still a winner. Kindergarten lunchbox for the win tomorrow. There is nothing Nagi can’t do
Fabulous recipe. Teen daughter declared it was a school lunch winner!
I had to comment because this came out underbaked the first time I tried it, but it was terrific the second time when I added 10 minutes (5 at each stage, uncovered and covered). We actually like it even better left over and reheated at 400 for 12 minutes.